|
The Making of Low Profiles |
|
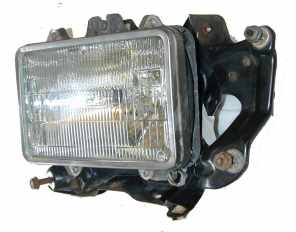
A. At the junkyard, I found a pair of single rectangular lamp holders. These came off a Geo. The holder includes the bezel for holding the sealed beams and the two point aiming mechanism. Wish I could have found a cleaner pair. Pretty rusty. |
|
 |
 |
|
|
|
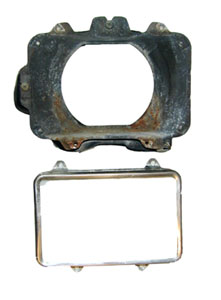
| B. Snip and cut. Some with a snips. Some with a sawzall. I cut away all the extra metal and all that's left is three pieces: (1) the bezel, (2) lamp holder and (3) the frame with the two alignmnet screws. Picture shows 2 &3 assembled, | |
 |
 |
|
|
|
| C. Here's the standard miata head light bracket. and now it's a matter of figuring out how to mount the new holder on the right, | |
 |
it took somorkhh |
|
|
|
|
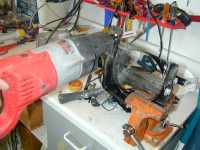
D. Since someone else would do it different, I'm leaving out the details. Made upper and lower brackets to frame the headlight holder, cut the OEM bracket, and attached the brackets. |
|
 |
I did cut the top of the factory bracket
and took off a lot of metal on the bottom so that the new rectangular
lights fit. I put the partially assembled headlight holder in the car to get the proper angle to attach the headlight frame. Oh yeah. It's important to leave the brackets that hold the headlight lids. .
|
|
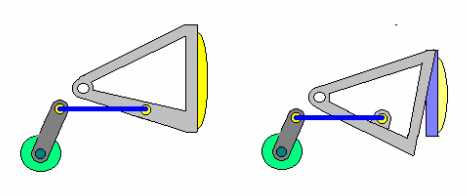
Alignment Geometry: 1) Shorter lever arm on the headlamp motor, I shortened the mazda lever by remounting
its ball on the arm to the same length as the BSP lever. I relocated the
ball on the mazda headlight asembly. In hindsight, I wonder if just a
shorter arm would work. 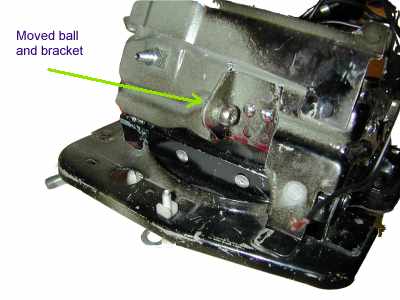 A crummy top view shown below. . It shows the metal metal bracket I had to install to relocate the ball. The motor stop screw didn't have to move, but it did need a longer screw. I also needed a new three pin connector for the rectangular lights , which are a little different from the round lights. 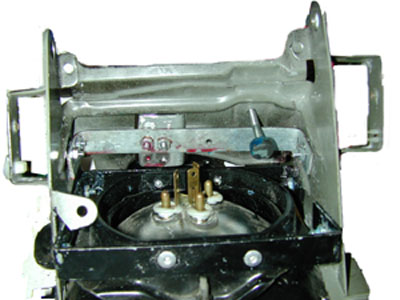
|
|
| Like I said, no fires yet. The sealed beams are easy to aim and I can see with them. | |
 |
|